Ever wondered why sourdough bread has been a favorite for centuries? It’s made with just flour and water, unlike regular bread. Sourdough uses a live culture, called a sourdough starter, to rise. This easy sourdough bread recipe is perfect for beginners looking to try homemade sourdough for the first time.
This article will show you how to make easy sourdough bread. It’s a great introduction to the world of sourdough baking, and I’ve included all the details you need to get started. You’ll learn how to bake simple sourdough at home and create a delicious loaf that’s both nourishing and tasty.
What is Sourdough Bread?
Sourdough bread is loved for its unique taste and texture. It uses a natural starter made from flour and water. This starter is different from regular yeast because it includes wild yeast and bacteria. This easy sourdough bread recipe uses this wild yeast to make the dough rise naturally.
This mix creates a bread that’s chewy and tangy. It’s a big difference from other breads.
Why Choose an Easy Sourdough Bread Recipe?
The fermentation process is what makes sourdough special. When I make sourdough, I let it ferment naturally. This takes about 5-8 days to get a strong starter. Using an easy sourdough bread recipe means you can achieve great results with minimal effort.
Wild yeast and bacteria break down gluten and phytic acid. This makes the bread easier to digest. It’s better for your body than many commercial breads.
Unique Features of Sourdough Bread
Sourdough bread has a special crust and flavor. The long fermentation makes the crust amazing. Each loaf tastes a bit different, thanks to the fermentation and ingredients used in this easy sourdough bread recipe. The dough’s high water content and organic flour add to its health benefits, making it a tasty choice for those who care about their health.
This depth of flavor is missing in regular bread. The dough’s high water content and organic flour add to its health benefits. Sourdough is a tasty choice for those who care about their health.

Getting Started with Your Easy Sourdough Bread Recipe
To start sourdough baking, knowing the key ingredients and tools is key. With the right equipment and this easy sourdough bread recipe, you can bake a delicious loaf of bread at home.
Essential Ingredients Needed for Easy Sourdough Bread Recipe
The base of great sourdough bread is its ingredients. This easy sourdough bread recipe calls for high-quality bread flour for better gluten, which helps the dough rise. An active sourdough starter is crucial for fermentation. Water and salt add flavor and help the dough grow. For this recipe, I mix 500 grams of bread flour, 350 grams of water, 50 grams of starter, and 10 grams of salt.
Whole grain flours in sourdough add lots of nutrients. They have more protein, which helps with cell repair and muscle growth. The long fermentation time also makes vitamins and minerals more available, boosting gut health.
Step-by-Step Easy Sourdough Bread Recipe
This easy sourdough bread recipe guides you from start to finish. Begin with an active sourdough starter, mix it with warm water and olive oil, then add your flour and salt. This will form a shaggy dough.
With each batch, you can try new flavors and textures. This lets you make the bread just how you like it. The smell of baking bread makes your kitchen feel cozy and inviting. It turns baking into a joyful experience.

How to Create Your Own Sourdough Starter for Easy Sourdough Bread Recipe
A sourdough starter is the heart of sourdough baking. It’s a live culture made from flour and water that ferments naturally. This is the key to the unique flavor of sourdough bread. This easy sourdough bread recipe ensures you get a great starter, which is perfect for beginners.
Essential Ingredients Needed
The base of great sourdough bread is its ingredients. I choose high-quality bread flour for better gluten, which helps the dough rise. An active sourdough starter is crucial for fermentation. Water and salt add flavor and help the dough grow.
For my recipe, I mix 500 grams of bread flour, 350 grams of water, 50 grams of starter, and 10 grams of salt. This mix creates a dough with a 72.0% hydration level.
Tools for Successful Sourdough Baking
Having the right baking tools is just as important. A Dutch oven keeps heat in, helping the crust form beautifully. A mixing bowl is key for mixing ingredients well.
A digital kitchen scale ensures I measure ingredients right, making each loaf consistent. A bench scraper makes dough handling easy, making shaping smooth. And, a baking thermometer is vital for water temperature, which boosts fermentation.
These tools are essential for my sourdough baking journey.
Easy Sourdough Bread Recipe
This easy sourdough bread recipe guides you from start to finish. Begin with an active sourdough starter, about 50 grams. Mix it with 350 grams of warm water and a bit of olive oil in a bowl. Then, add 500 grams of flour and 10 grams of salt slowly. This will form a shaggy dough.
Step-by-Step Instructions
Once mixed, cover the bowl and let the dough rest for 30 minutes. This step, called autolyse, helps the flour absorb water and develop gluten. For a great loaf, aim for a bulk rise of 8 to 10 hours at 65°F. If it’s warmer, it might rise in 12 hours.
After the first rise, shape the dough. Then, let it rise again for up to 2 hours for the best texture.
Measurements and Ratios for a Perfect Loaf
Getting the measurements right is crucial for a perfect loaf. Keep a flour-to-water ratio that adjusts for humidity. In summer, reduce water by 10% to avoid a too-wet dough. You can also use up to 20% whole grains without losing the main flavor.
Preheat your oven to 425°F when you’re ready to bake. The bread will need about 30 minutes covered and 20 to 30 minutes uncovered. It should reach an internal temperature of 204°F for full baking.

Understanding the Sourdough Starter
A sourdough starter is the heart of sourdough baking. It’s a live culture of wild yeast and bacteria. Made from flour and water, it ferments bread, giving it unique flavors that commercial yeast can’t match. Learning to make a sourdough starter opens up a world of possibilities in baking.
What is a Sourdough Starter?
A sourdough starter is a mix of flour and water that ferments naturally. This process creates a bubbly, active culture. It’s key for leavening sourdough bread without commercial yeast. Keeping a healthy starter is vital for the bread’s flavor and texture.
How to Make a Simple Sourdough Starter
To make a simple sourdough starter, start with equal parts flour and water. I mix 60 g of whole wheat flour with 60 g of water for my first try. This mix ferments over several days.
I feed it daily by removing some and adding equal parts flour and water. This increases the starter’s yield. After about a week, it bubbles and doubles in size, showing it’s ready to use.
Learning to make a sourdough starter connects me to the baking process. It improves my bread’s quality. A well-fed starter should be like thick pancake batter, showing it’s ready for baking. The journey is patient but rewarding in flavor and texture.

Feeding Your Sourdough Starter
Maintaining a sourdough starter is key for great bread. Regular feedings keep the yeast and bacteria alive and active. I use a simple method: equal parts flour and water, or a 1:1 ratio. For example, if I have 1 cup of starter, I add 1/2 cup of flour and 1/2 cup of water.
This keeps my starter strong and bubbly.
Best Practices for Maintaining Your Starter
Feeding my sourdough starter every 12 to 24 hours helps it thrive. In warmer places, it needs more frequent feedings, about every 12 hours. If I store it in the fridge, it can last up to two months without food.
To revive a fridge starter, I do 2 to 3 feedings, 12 hours apart. After each feeding, I let it sit for 4 to 12 hours. This makes sure it’s active and ready for baking.
Determining When Your Starter is Ready
One way to check if my starter is ready is the “float test.” I drop a small starter amount in water. If it floats, it means the starter is at its best.
A good starter doubles in size in 4 to 6 hours. Watching for these signs makes me more confident in my baking.

The Bread-Making Process Explained
The bread-making process has several key stages that impact your sourdough loaf’s final taste and texture. It starts with mixing the dough, combining flour, water, and sourdough starter. I often use autolyse, a step that improves gluten hydration. This makes the dough easier to work with and enhances its texture.
Mixing and Autolyse
When mixing dough, I aim for a uniform mix without over-kneading. Autolyse can last from 30 minutes to 4 hours. It lets flour soak up moisture and start gluten development.
This makes the dough stronger, essential for rising during bulk fermentation.
Bulk Fermentation and Its Importance
Then, I enter the bulk fermentation stage. It lasts 3 to 12 hours, depending on the starter’s strength and the environment. The dough rests and rises, improving its flavor and structure.
It’s crucial to watch the dough’s volume. A 50-80% increase is ideal for a light loaf. Over-fermentation can make bread heavy and dense. I perform stretch-and-fold techniques to strengthen the gluten. This is vital for a great texture in the final loaf.

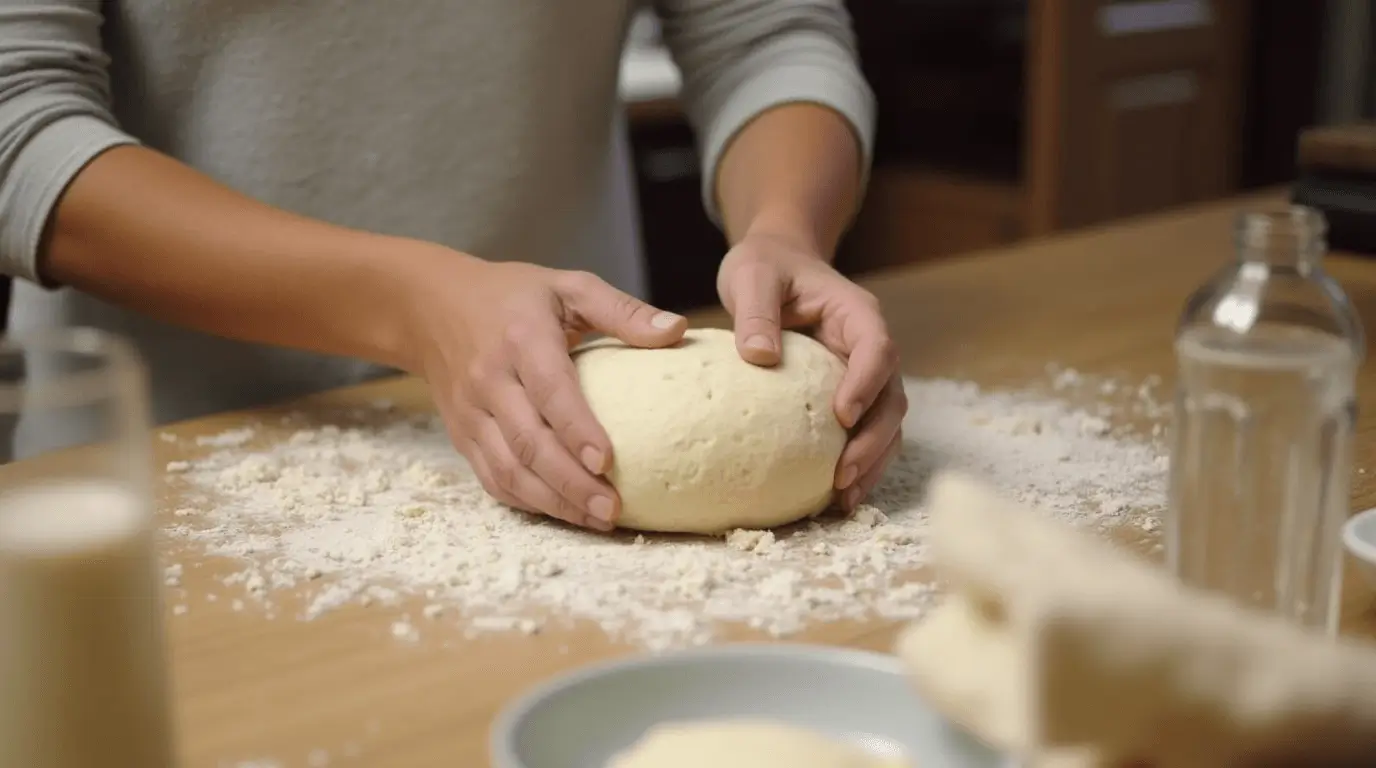
Shaping and Proofing Your Dough
Shaping sourdough right is key to getting a beautiful loaf. After the bulk fermentation, divide and preshape the dough. This lets the dough relax by about 30%.
But, the exact amount can vary. For example, a wet whole wheat dough relaxes faster than a dry white dough.
Best Techniques for Shaping Sourdough
Using the right techniques for shaping sourdough is important. It helps create a tight outer skin. This skin is vital for keeping the loaf’s shape during baking.
I use “stitching” for slack dough and “cinching” for a softer approach. This helps create an open crumb. For buns or rolls, let them rise in the pan or on a covered baking sheet.
Make sure the dough is well preshaped. This makes the final shaping easier.
Understanding the Second Rise
The second rise, or proofing, is crucial for flavor and rise. It lasts about 2 1/2 hours at room temperature. The dough changes a lot during this time.
Using proofing baskets or Dutch ovens helps keep the shape. Issues like stickiness can happen. This is due to too much water, not enough strengthening, or proofing too long. So, it’s important to watch closely for the best results.

Baking Your Sourdough Bread
Getting the right temperature and timing is key for baking sourdough bread. It ensures a perfect balance of flavor and texture. Preheating a Dutch oven is crucial. It captures steam, creating a stunning crust.
Temperature and Timing Guidelines
I start by preheating the oven to 500°F. This high heat helps the bread rise well in the first 20 minutes. Then, I lower it to 450°F for another 20 to 35 minutes.
It’s important to check the internal temperature. I aim for 205°F to 210°F. This ensures the bread is fully baked and ready to enjoy.
Using a Dutch Oven for Perfect Crust
Baking with a Dutch oven keeps moisture in. This method creates a perfect crust. The steam inside the pot makes the crust golden-brown and the inside soft.
This technique really improves my sourdough bread. It makes every loaf special.

Sourdough Baking Tips
Starting with sourdough baking can be tough. I’ve gathered key tips to help you succeed. Knowing how to avoid mistakes is key to making a great loaf. It’s all about mastering the sourdough art.
Avoiding Common Mistakes
One big mistake is using an un-fed sourdough starter. Feed it 4-12 hours before baking to make it active. Another mistake is over-fermenting, which makes the loaf dense.
Watch how your dough rises. It should double in size in 6-12 hours. Use a digital scale for accurate measurements. Too much water makes the dough sticky.
How to Troubleshoot Dough Issues
Watching your dough closely helps solve problems. If it’s too dry, wet hands can help. A float test checks if your starter is ready.
If your dough won’t rise, check the temperature and humidity. They affect how long it takes to rise, from 2-12 hours. Good management leads to better baking.
Storing and Enjoying Your Sourdough Bread
After baking, the next step is storing sourdough bread right. This keeps it fresh and tasty. The best way is to store it in a paper bag or bread box at room temperature. Plastic bags can make the bread soggy.
Wrapping it in a clean towel is another good option. It lets air in while keeping moisture in.
Best Practices for Storing Bread
To keep bread fresh longer, freeze it in slices. This way, you can enjoy it for up to three months. Just make sure to use an airtight container or bag to avoid freezer burn.
Toasting frozen slices can make them taste like new. Always check the bread for staleness or mold before eating.
Serving Suggestions and Pairings
There are many ways to enjoy sourdough bread. Try spreading butter or jam on warm slices. It’s also great with cheeses like Brie or sharp cheddar.
Turning sourdough into toast for open-faced sandwiches is a tasty meal. Pairing it with soups and salads adds a nice contrast. This bread is so versatile, it’s a must-have in my kitchen.
Conclusion
In this guide, I’ve shared easy sourdough bread recipes for beginners. The steps and ingredients are simple, making it perfect for new bakers. This recipe has a 74% hydration level, making mixing and shaping easier.
Homemade sourdough is more than just bread; it’s a journey. Waiting for the dough to rise and baking it brings joy. With about 20 slices, sharing your sourdough adds to family meals and gatherings.
Keep trying new things as you bake. Experiment with fermentation, hydration levels, and flour types. Each loaf is a chance to learn and improve. Soon, you’ll enjoy delicious bread and a deeper connection to sourdough baking.
FAQ
What type of flour should I use for sourdough bread?
For the best results, use high-quality bread flour. It gives better gluten structure. All-purpose flour works too, but it might not be as good.
How do I know if my sourdough starter is ready to use?
Check if your starter is bubbly and has doubled in size after feeding. The “float test” also works. If a small amount floats in water, it’s ready.
Can I make sourdough bread without a Dutch oven?
Yes, you can bake sourdough without a Dutch oven. Use a baking stone or a regular oven with a steam pan. They help create a perfect crust.
How long does sourdough bread need to rise?
The first rise, or bulk fermentation, takes 4 to 8 hours. This depends on the room temperature. The second rise should be between 30 minutes and 2 hours.
What if my dough feels too sticky?
Stickiness is often due to high hydration levels. If it’s too sticky, add a bit more flour while kneading. Or use the stretch-and-fold technique to strengthen the gluten.
How do I store my sourdough bread to keep it fresh?
Store your sourdough in a paper bag or bread box at room temperature. Avoid plastic, as it can make the crust soggy.
What can I do with leftover sourdough starter?
Use leftover starter in recipes like pancakes, waffles, or pizza dough. Or discard it or share it with someone to start their own sourdough journey.
How can I improve the flavor of my sourdough bread?
To improve flavor, try different flours, extend fermentation time, or add seeds or herbs to your dough.
Why does my sourdough bread not rise properly?
Poor rising can be due to an inactive starter, wrong fermentation times, or environmental factors like temperature. Keep an eye on these to get better results.