This is a simple foolproof easy sourdough bread recipe designed for beginners No special gear required Minimal hands on time Clear timeline options for overnight and same day methods Yield one 800 900 g artisan loaf
Prep summary hands on 20–30 minutes Bulk fermentation 3–6 hours warm or overnight 8–14 hours cool Final proof 1–4 hours or overnight in fridge Bake 30–45 minutes Adjust times by temperature and starter activity
What youll get from this article a step by step timeline a printable recipe card photos techniques for mixing stretch and folds shaping proofing scoring and baking It also includes quick troubleshooting dense crumb weak rise too sour simple variations whole wheat no Dutch oven and a same day shortcut using higher starter percentage
TL DR for quick action mix flour water starter salt bulk ferment with 3–4 stretch and folds shape and proof overnight or same day bake in a hot Dutch oven or covered pan
Why This Easy Sourdough Bread Recipe Works for Beginners
The biggest barrier to sourdough baking is the myth that its complicated In reality you only need four ingredients flour water salt and an active sourdough starter Everything else is time and patience This recipe is streamlined to cut away confusing steps so even first time bakers can succeed
- No kneading required Instead of heavy mixing youll use stretch and folds during bulk fermentation
- Flexible timing Works with both overnight fermentation and same day baking
- Simple tools A mixing bowl kitchen scale and an oven safe pot are enough
The fermentation process does most of the work Youll spend less than 30 minutes actually handling dough The rest is resting proofing and baking Thats why this version of easy sourdough bread is a reliable entry point into natural bread baking
What Makes This Sourdough Bread Recipe Easy for Beginners
- Minimal ingredients
- Forgiving fermentation schedule
- Clear visual cues dough doubling airy texture smooth surface
Ingredients Youll Need for Easy Sourdough Bread
You dont need much to make a perfect loaf of easy sourdough bread Four ingredients form the base and a few optional add ins can personalize the flavor
Core Ingredients for Easy Sourdough Bread
- Bread flour 500 g about 4 cups Creates a strong elastic dough that traps air for an open crumb
- Water 350 g 1½ cups Use filtered or room temperature water to keep yeast activity steady.
- Active sourdough starter 100 g ½ cup It should be bubbly and doubled in size within four to six hours after feeding.
- Salt 10 g 1¾ tsp Strengthens gluten and balances the mild tang of fermentation
Optional Additions to Enhance Easy Sourdough Bread
Add 1 tablespoon of olive oil for a softer crust or a touch of honey for mild sweetness Seeds herbs or spices like sesame rosemary or garlic powder can enhance texture and aroma
Ingredient Notes for the Best Easy Sourdough Bread
Bread flour gives a classic chewy texture but you can swap half for whole wheat to add flavor depth Before mixing test your starter by dropping a spoonful into water if it floats its active When the dough feels stiff add a splash of water if its sticky sprinkle a bit more flour Because humidity and flour type vary pay attention to feel more than numbers.
With these balanced ratios and small adjustments your dough will develop elasticity and strength naturally ideal for beginners learning fermentation by touch
Step by Step Instructions for Easy Sourdough Bread
Follow this sequence exactly once youve prepared your active starter The process looks long but only a few minutes require hands on work
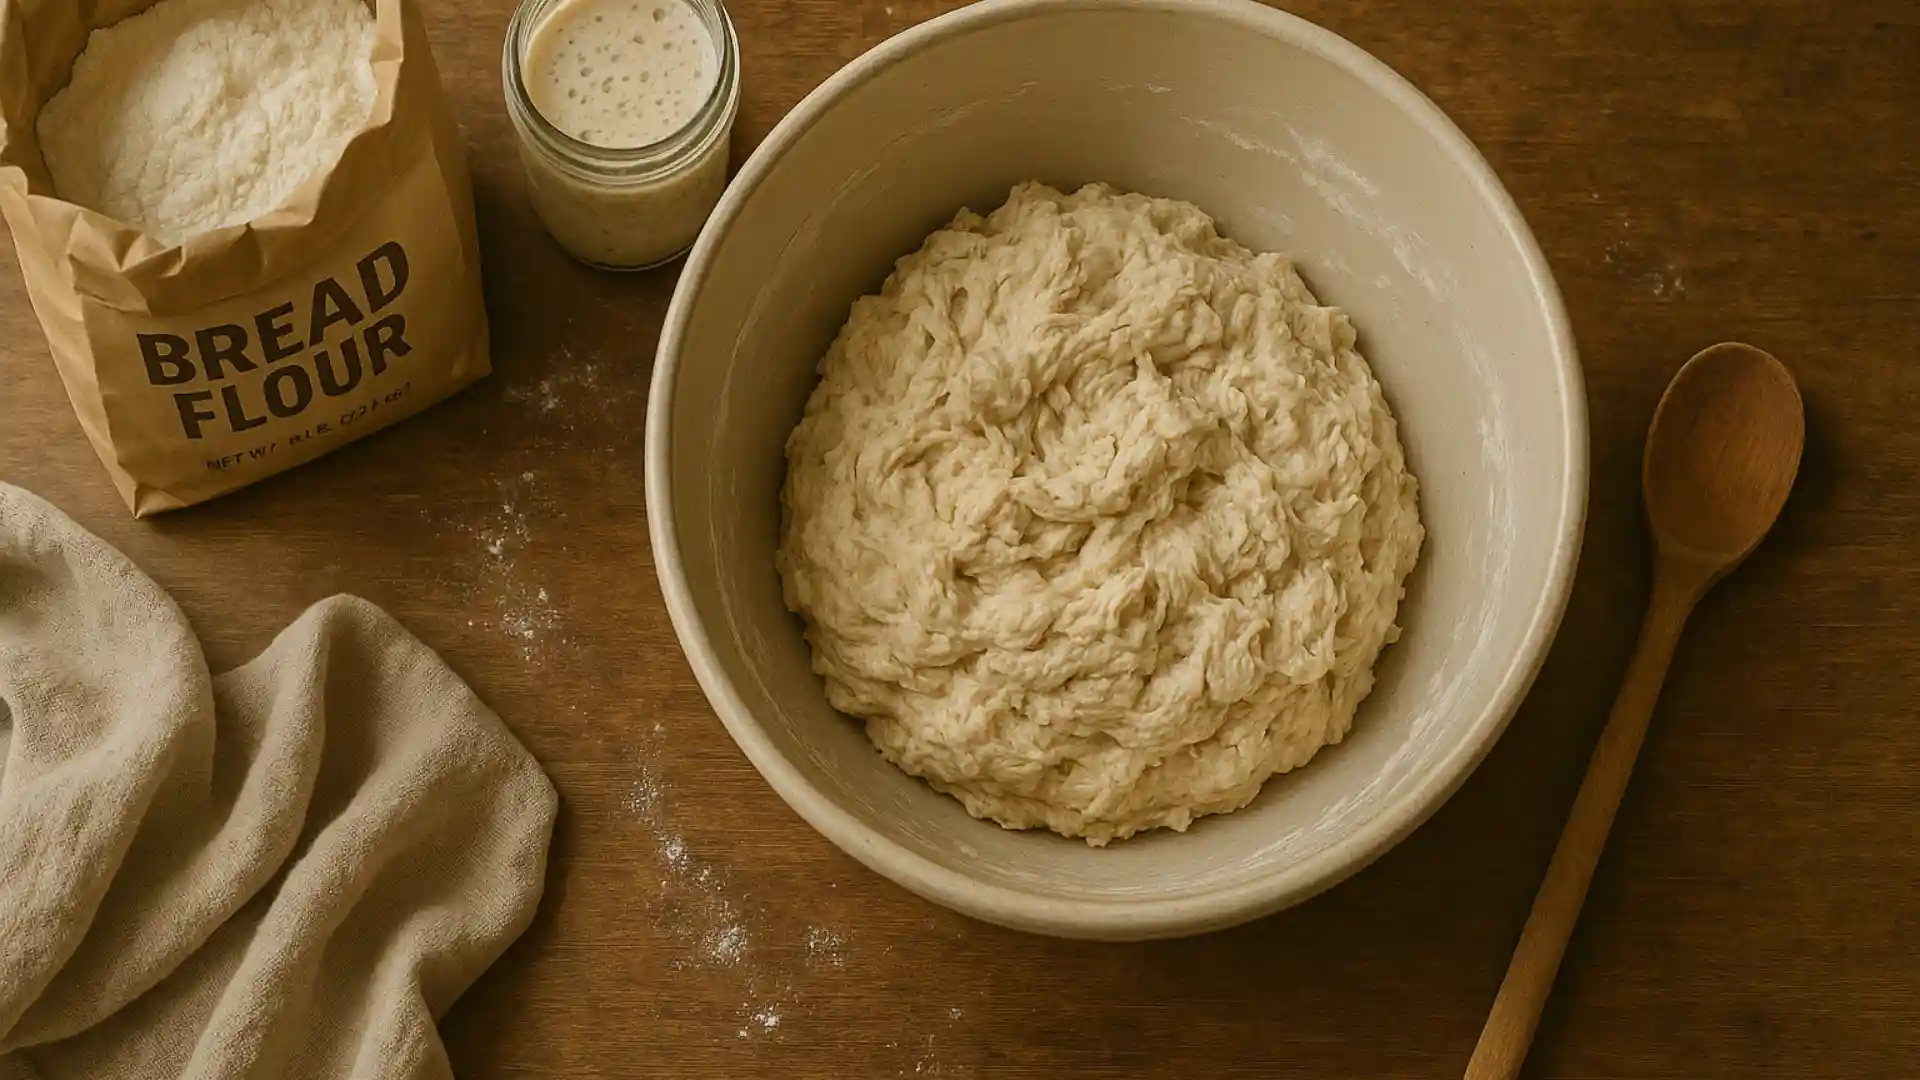
Step 1: Mix the Dough
In a large bowl combine
- 500 g bread flour
- 350 g water
- 100 g active sourdough starter
- 10 g salt
Stir with a spoon or hand until no dry flour remains. The dough will feel shaggy and sticky. Cover the bowl and let it rest for 30 minutes. This rest period, called autolyse, lets the flour absorb water and start gluten development
Step 2: Stretch and Fold
After the first rest perform your first stretch and fold
- Wet your hand grab one side of the dough stretch it up and fold it over itself
- Rotate the bowl a quarter turn and repeat 3–4 times
Cover again and rest for 30 minutes.
Repeat this process 3–4 times over the next 2 hours Each set strengthens the gluten and builds dough structure without kneading
Step 3: Bulk Fermentation
Leave the covered bowl at room temperature around 22–25°C 72–77°F for 3–6 hours The dough should roughly double in size feel airy and show bubbles on the surface In cooler rooms this stage can last longer
To test readiness wet your finger and press the dough gently if the indentation springs back slowly its ready to shape
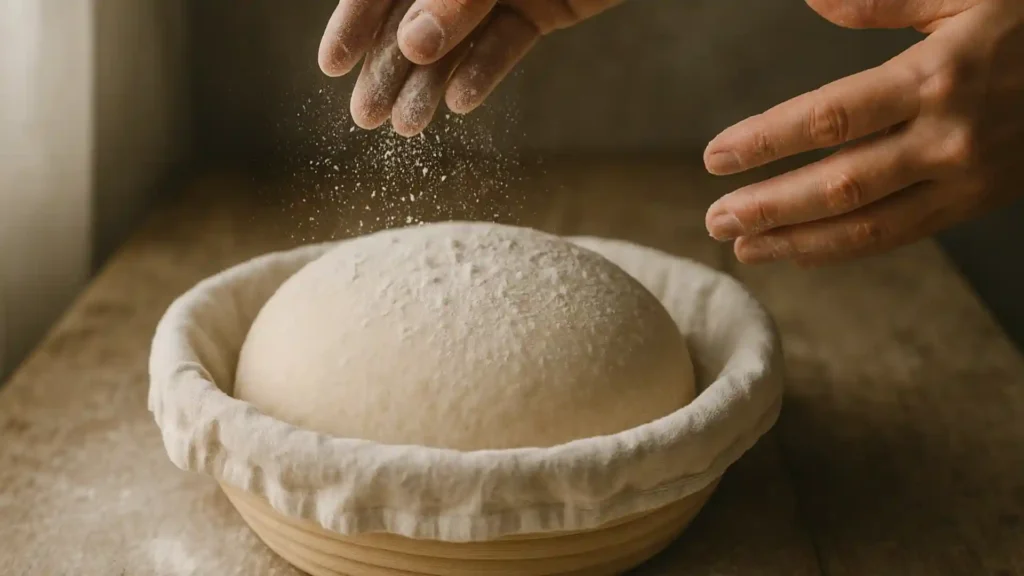
Step 4: Shape the Dough
Lightly flour your counter Turn the dough out and form a rough ball Use a bench scraper to fold the edges toward the center creating surface tension Flip it seam side down and let it rest uncovered for 15–20 minutes
Then tighten the shape by gently pulling the dough toward you several times Place it seam side up in a floured proofing basket or bowl lined with a towel
Step 5: Proofing Two Options
- Overnight method best flavor Cover and refrigerate 8–14 hours
- Same day method: Proof at room temperature for 2–4 hours until slightly puffy and wobbly
The dough is ready when it slowly springs back after a light poke
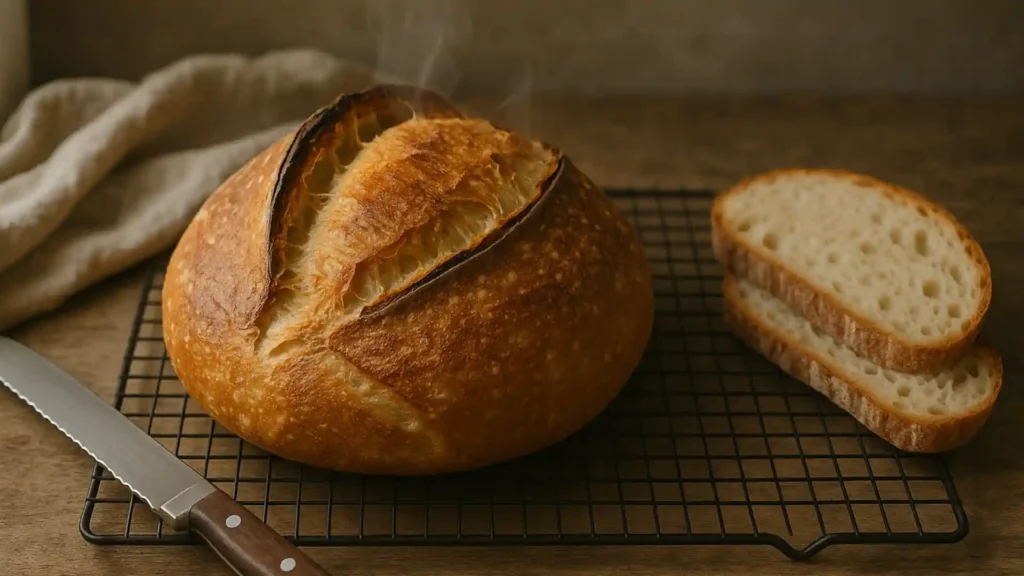
Step 6: Bake the Bread
- Preheat your oven to 230°C 450°F with a Dutch oven inside for at least 30 minutes
- Carefully transfer the dough onto parchment paper score the top with a sharp blade and place it into the hot pot
- Bake covered for 20 minutes then uncovered for 20–25 minutes until golden brown
Remove and cool completely on a wire rack before slicing at least one hour Cutting too early compresses the crumb
Quick Reference Timeline
| Step | Active Time | Rest/Fermentation | Total |
|---|---|---|---|
| Mix | 10 min | 30 min | 40 min |
| Stretch & Fold | 5 min each set | 2 h | 2 h 20 min |
| Bulk Fermentation | — | 3–6 h | — |
| Proof | — | 2–14 h | — |
| Bake | 45 min | — | 45 min |
Tips for the Best Easy Sourdough Bread Results
Good sourdough comes from rhythm not perfection These tips help you build consistency and avoid the most common beginner mistakes
1. Keep Your Starter Strong
Feed your sourdough starter at least 4–8 hours before mixing It should double in size smell slightly fruity and show small bubbles If it rises slowly or smells like acetone feed it twice before baking day
Pro tip: Maintain your starter at 1:1:1 ratio starter flour water by weight A healthy starter is the backbone of a light open crumb
2. Control Temperature
Fermentation speed depends on warmth Aim for 22–25°C 72–77°F If your kitchen is cold place the bowl inside a turned off oven with the light on or wrap it in a towel Too hot and your dough ferments too fast resulting in excess sourness or collapse
3. Watch the Dough Not the Clock
Timelines are guides Always judge dough readiness by look and feel It should expand feel airy and slightly jiggle when moved Underproofed dough feels dense overproofed dough collapses when poked
4. Score With Intention
Scoring guides oven spring and prevents random cracks Use a razor or sharp knife at a shallow 30–45° angle One central slash works best for beginners
5. Steam Makes the Crust
If you dont use a Dutch oven add steam manually place a metal tray on the lower rack preheat it with the oven and pour in a cup of hot water right before baking Steam keeps the crust flexible during the first rise giving your loaf more volume
6. Practice and Adjust
Every starter flour and kitchen behaves differently Keep notes on timing temperature and dough feel Small improvements each bake will give you repeatable success
FAQ Why Is My Sourdough Bread Dense?
Usually because the dough was underproofed or the starter was weak Check if your starter doubles after feeding and let the dough rise until clearly puffy before baking
Common Problems & Troubleshooting Easy Sourdough Bread
Even experienced bakers face inconsistent results Sourdough reacts to temperature starter strength and hydration Use this guide to identify what went wrong and correct it next time
Problem 1: The Bread Didnt Rise
Cause: Weak or inactive starter low fermentation temperature or short proofing time
Fix:
- Feed the starter twice in 24 hours before baking
- Extend bulk fermentation by 1–2 hours
- Keep the dough in a warm but not hot environment, around 25°C 77°F
Problem 2: The Loaf Is Dense or Gummy
Cause: Underproofed dough or too much moisture trapped inside
Fix:
- Let dough rise longer until it feels airy and jiggly
- Ensure the loaf cools fully before slicing
- Next time bake uncovered for 5–10 minutes more to dry the crumb
Problem 3: The Bread Is Too Sour
Cause: Overfermentation or overripe starter
Fix:
- Shorten proofing time or refrigerate earlier
- Feed starter more frequently to balance acidity
- For milder flavor reduce starter from 20% to 10% of total flour weight
Problem 4: The Crust Is Too Hard or Dark
Cause: Excessive baking time or dry oven
Fix:
- Reduce final uncovered bake by 5 minutes
- Brush crust lightly with olive oil or butter after baking
- Use more steam early in the bake to improve texture
Problem 5: The Loaf Spread Out Instead of Rising
Cause: Overproofing or weak gluten development
Fix:
- Perform all stretch and fold sets during bulk fermentation
- Shape the dough tightly to build surface tension
- Bake sooner once the dough feels light but still holds form
Quick Recovery Tip
If a loaf flattens or overproofs, bake it anyway Even imperfect sourdough has a good flavor Use the result for toast croutons or breadcrumbs waste nothing
Easy Sourdough Bread Variations and Substitutions
Once you master the base recipe, small changes let you adapt the loaf for flavor texture or dietary needs These variations keep fermentation simple but expand what you can do with the same technique
Whole Wheat or Multigrain Sourdough
Replace up to half of the bread flour with whole wheat or rye Add 10–15 g extra water to offset the brans absorption The result is a darker crust deeper flavor and slightly denser crumb
Tip: Toast the grains lightly before mixing for a nutty aroma
Seeded or Herb Sourdough
Mix in 30–40 g of sesame flax or sunflower seeds during the last stretch and fold For herbs add 1 tsp dried rosemary thyme or oregano to the flour before mixing Seeds add crunch and nutrition herbs give aroma without affecting rise
Overnight Sourdough
If you prefer a slow fermentation refrigerate the dough right after shaping and bake it the next morning The cold rest develops complex flavor and makes scoring easier because chilled dough is firmer
Same Day Sourdough
Increase starter to 150 g and ferment at warm room temperature 25–26°C 77–79°F Bulk fermentation will finish in about 3 hours and you can bake within 6–8 hours total Flavor is milder texture slightly softer
No Dutch Oven Version
Use a baking stone or tray Place an empty metal pan on the lower rack while preheating When you load the bread pour 1 cup of hot water into the pan to create steam Close the door quickly to trap moisture
Gluten-Free Sourdough
Combine 400 g gluten-free flour blend with 100 g brown rice flour and 1 tsp xanthan gum Add 380–400 g water and 100 g gluten-free starter The dough will resemble thick batter Proof 2–3 hours then bake in a loaf pan
FAQ — Can I Add Yeast to Speed It Up?
Yes if your starter is weak or you want faster proofing Add 1 g instant yeast to the dough It wont ruin the sourdough flavor but will reduce fermentation time by 30–40%
FAQs About Easy Sourdough Bread
Here are quick answers to the most common beginner questions These tips help you manage timing texture and storage with ease
Can I Make Sourdough Bread Without a Starter?
True sourdough always needs a starter yet you can make a similar version Combine 150 g flour 150 g water and 1 g instant yeast Let it rest for 12–16 hours This mix acts as a temporary starter giving mild flavor and reliable rise
How Do I Know When My Dough Is Ready to Bake?
Press the dough lightly with a floured finger When the dent springs back slowly its proofed and ready If it bounces back right away allow more time. However if it collapses or feels weak its overproofed bake it immediately to keep structure
Do I Need a Dutch Oven?
Not necessarily A Dutch oven helps trap steam for crust development but you can still bake excellent bread without one Simply place your dough on a preheated tray and add a metal pan of hot water to the lower rack Alternatively cover the loaf with a metal bowl during the first 20 minutes of baking
How Long Does Homemade Sourdough Bread Stay Fresh?
Normally it keeps well for two to three days at room temperature in a paper bag or linen towel For longer storage freeze slices in airtight bags They stay fresh for up to one month Remember to let the bread cool before storing to prevent soggy crusts
Why Does My Bread Taste Too Sour?
The main cause is long fermentation or an overripe starter To balance flavor shorten proofing time and feed the starter more often Moving the dough to a cooler area also slows acid buildup and gives a milder taste
Can I Freeze the Dough Before Baking?
Yes you can Shape the dough first then freeze it right away When ready to bake thaw it overnight in the refrigerator Expect slightly less oven spring but the flavor remains rich and balanced
Serving & Storage Ideas for Easy Sourdough Bread
Homemade sourdough is best enjoyed fresh but it also keeps well when stored correctly These serving and storage tips help you make the most of each loaf
Serving Suggestions
Fresh sourdough has a crisp crust and light tangy crumb that pairs easily with many foods
- Slice it thick and serve with soups stews or salads
- Toast it for breakfast with butter avocado or jam
- Use it for grilled cheese or open faced sandwiches
- Cube leftovers for croutons or blend them into breadcrumbs
For best flavor let the bread cool at least one hour before slicing Cutting too soon compresses the crumb and releases steam that softens the crust
Storage at Room Temperature
Store the loaf in a paper bag or linen bread bag These materials allow airflow and keep the crust crisp for two to three days Plastic traps moisture and softens the crust so avoid it unless you prefer a softer texture
Freezing and Reheating
To store longer slice the loaf and freeze it in airtight bags This prevents freezer burn and lets you thaw only what you need For reheating place frozen slices directly in the toaster or warm a whole loaf in a 180°C 350°F oven for 10–15 minutes
Refreshing Older Bread
When sourdough feels stale, sprinkle it lightly with water and warm it in the oven for five minutes. The moisture revives the crust and restores freshness.
FAQ How Can I Keep the Crust Crisp After Baking?
Cool the loaf on a wire rack so steam escapes evenly Once cooled store it uncovered for several hours before bagging This keeps the crust crunchy and flavorful longer
Conclusion Mastering Easy Sourdough Bread at Home
Making sourdough at home doesnt have to be complicated With four ingredients a little time and patience you can bake a crusty flavorful loaf that tastes better than store bought bread The beauty of sourdough lies in the process every loaf teaches you something new about timing texture and fermentation
Once youve made this easy sourdough bread a few times, you’ll start to recognize the subtle signs of perfect dough a smooth surface light jiggle and that familiar earthy aroma that fills the kitchen From there you can experiment try adding whole grains seeds or even shaping baguettes for a different bake
If you enjoyed this recipe explore more sourdough variations on Quick Morsels
- Sourdough Baguette Recipe (Easy) learn how to shape score and bake perfect baguettes
- Easy Gluten-Free Sourdough Bread Recipe for a naturally fermented loaf that fits gluten free diets
Keep your starter active take notes after each bake and enjoy the rhythm of slow mindful breadmaking Every loaf brings you one step closer to mastering sourdough