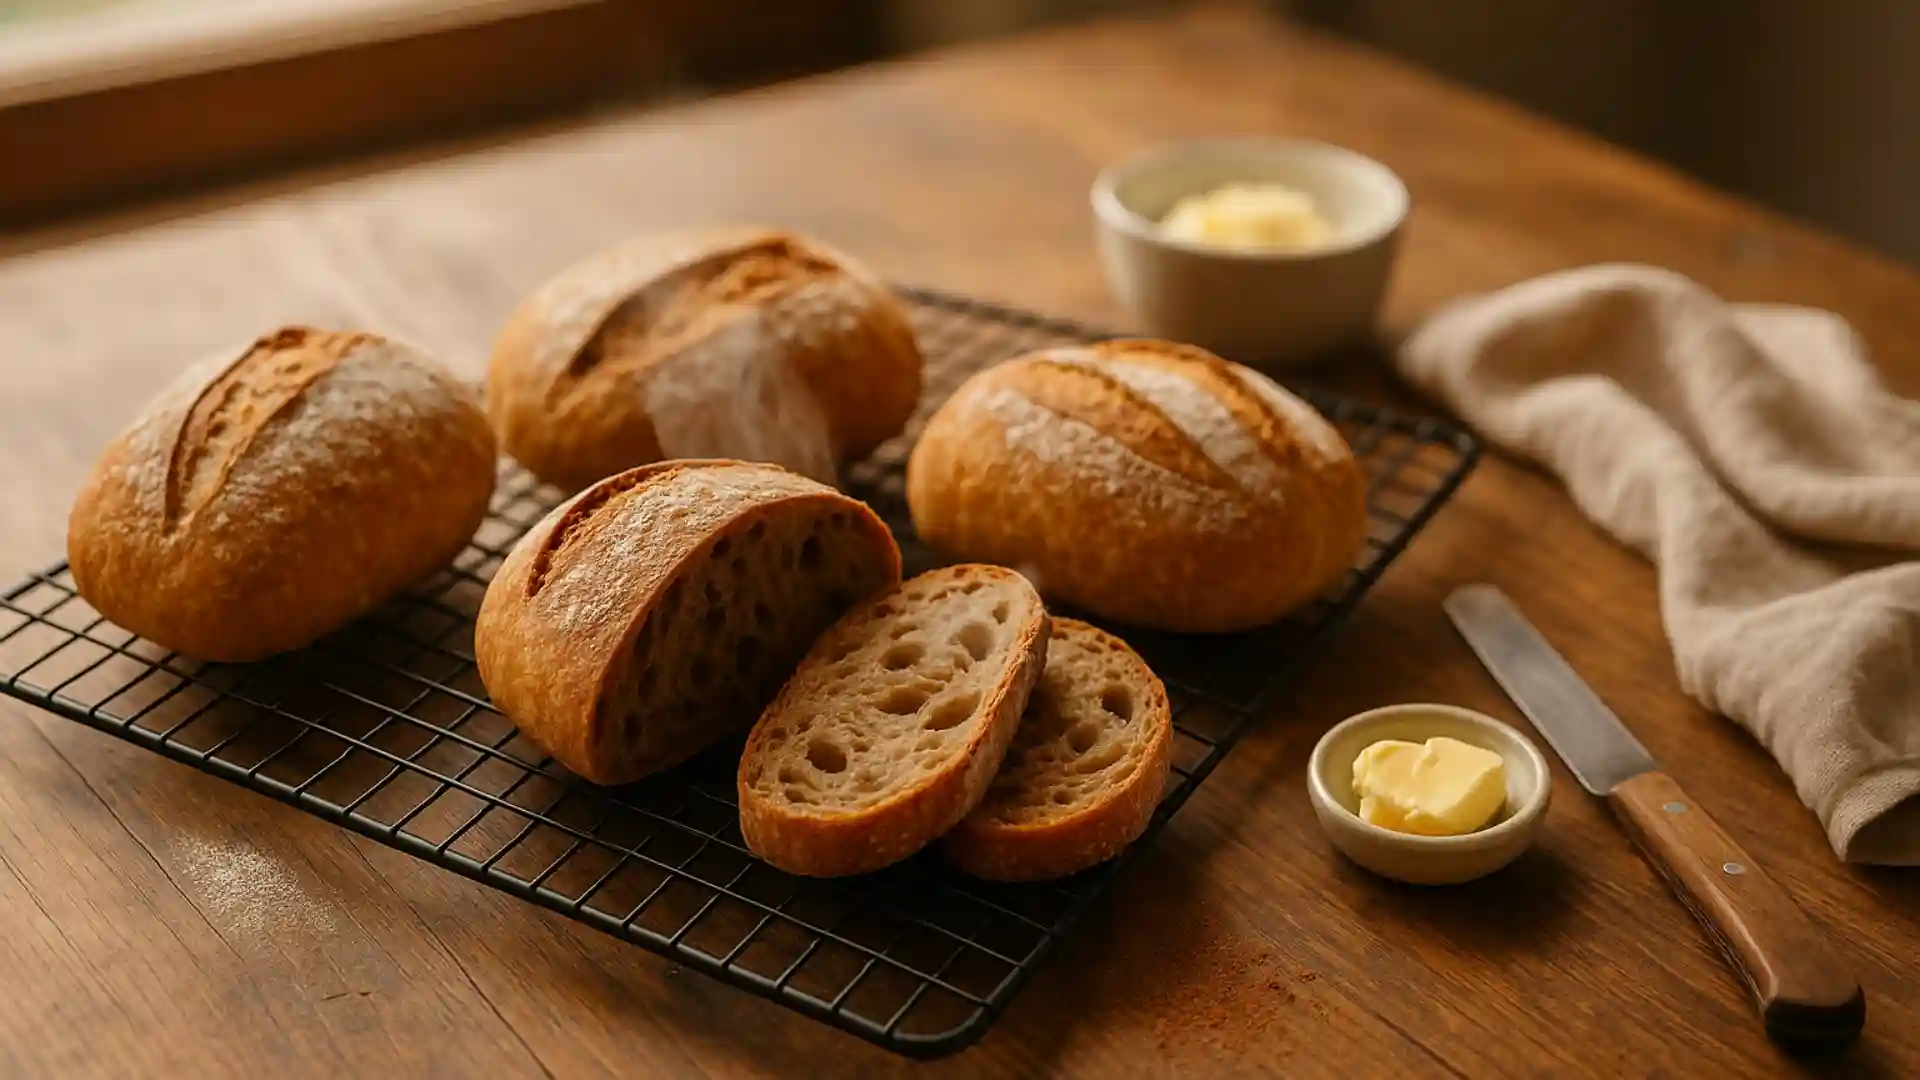
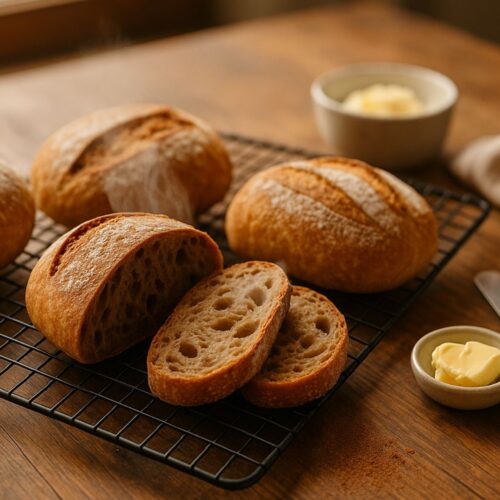
There’s something irresistibly satisfying about baking your own mini sourdough loaves. These small golden rounds deliver the tangy flavor of traditional sourdough in a perfectly shareable size ideal for gifting snacking or serving alongside soups and salads.
Mini sourdough loaves are the ultimate solution for small households meal preppers or anyone who loves artisan bread but doesn’t want a massive loaf going stale on the counter. These little boules bake faster look adorable and are surprisingly versatile from pairing with soups and stews to serving as edible bread bowls or gifting to friends.
This recipe walks you through how to make mini sourdough loaves that are crisp on the outside tender inside and packed with that signature sourdough tang. Whether you’re a beginner baker or a seasoned pro looking for smaller batches you’ll learn how to mix shape and bake loaves that rise beautifully even without a Dutch oven.
So roll up your sleeves grab your starter and let’s turn your kitchen into a mini bakery filled with rustic charm and irresistible sourdough scent.
Mini Sourdough Loaves Easy Small Batch Bread Recipe
Equipment
- Digital Kitchen Scale
- Mixing bowl
- Bench scraper
- 4 mini bannetons or small bowls with towels
- Baking steel/stone or baking sheet (or mini Dutch ovens)
- Parchment paper
- Bread lame or sharp knife
- Cooling rack
Ingredients
– 100 g active sourdough starter (fed 4–6 hours prior)
– 300 g lukewarm water (about 80°F / 26°C)
– 400 g bread flour
– 50 g whole wheat flour
– 8 g fine sea salt (about 1½ tsp)
Optional add-ins (choose up to 80–100 g total):
– 40 g shredded sharp cheddar + 1 jalapeño, finely chopped
– 40 g chopped walnuts + 30 g dried cranberries
– 30 g dark chocolate chips + 1 Tbsp cocoa powder
– 1 Tbsp sesame or pumpkin seeds for coating
Instructions
Activate StarterFeed your sourdough starter 4–6 hours before mixing. It’s ready when doubled and bubbly (a spoonful floats in water).
Mix Dough In a bowl, whisk 100 g starter into 300 g water until dispersed. Add 400 g bread flour and 50 g whole wheat flour; mix until no dry spots remain. Cover and rest 30–45 minutes (autolyse).
Add Salt & Begin Bulk Sprinkle 8 g salt over the dough. Pinch and fold to incorporate. Bulk ferment 4–5 hours at 75–78°F (24–26°C), performing 3–4 sets of stretch-and-folds every 30 minutes in the first 2 hours.
Optional Add-ins During the last fold, gently laminate or fold in any add-ins (keep total under ~20–25% of dough weight).
Divide & Pre-shape Turn dough onto a lightly floured surface. Divide into 4 equal pieces (about 200–220 g each). Pre-shape into loose rounds; rest 15 minutes, uncovered.
Final Shape Tighten each round by dragging toward you to build surface tension. Place seam-side up in floured mini bannetons or towel-lined bowls.
Cold Proof Cover and refrigerate 8–12 hours (overnight) for deeper flavor and easier scoring.
Preheat & Steam Prep Place a baking steel/stone or sheet in the oven; preheat to 450°F (230°C) for 30 minutes. Add a small pan to the lower rack for steam.
Score & Bake Invert loaves onto parchment, score tops (simple “X” works great). Slide onto the hot surface. Add 1 cup hot water to the steam pan. Bake 20–25 minutes until deep golden with crisp crust.
Cool Transfer to a cooling rack and cool at least 1 hour before slicing for best crumb.
Notes
– For a thinner crust, brush warm loaves with a little butter or olive oil.
– Freeze: wrap tightly; up to 2 months. Reheat at 350°F (175°C) for 8–10 minutes.
– No Dutch oven? Create steam with a pan of hot water for the first 10 minutes.
– Alt text ideas for images: “mini sourdough loaves cooling on rack,” “shaping mini sourdough loaves by hand,” “crumb shot mini sourdough loaf.”
Ingredients for Mini Sourdough Loaves
Making mini sourdough loaves doesn’t require any fancy tools just a few essentials and high quality ingredients. The secret is simplicity good flour active starter and a bit of patience.
Ingredients for Mini Sourdough Loaves Makes 4 Small Loaves
| Ingredient | Amount | Notes |
|---|---|---|
| Active sourdough starter | 100g ½ cup | Fully bubbly and fed within 4–6 hours before baking |
| Bread flour | 400g about 3 ¼ cups | High protein flour gives the best structure |
| Whole wheat flour | 50g ½ cup | Adds depth of flavor and nutrients |
| Water | 300g 1 ¼ cups | Lukewarm around 80°F / 26°C |
| Salt | 8g 1 ½ tsp | Use fine sea salt for even distribution |
| Optional add ins | Try chopped herbs cheese or seeds for flavor variations |
Tip: If your kitchen is cooler use slightly warmer water to help fermentation. If it’s warm use cool water to slow things down for better flavor.
Equipment You’ll Need to Bake Mini Sourdough Loaves
| Equipment | Purpose |
|---|---|
| Mixing bowl | For combining dough ingredients |
| Bench scraper | Helps divide and shape your mini loaves neatly |
| Digital kitchen scale | Ensures precise measurements crucial for sourdough |
| Proofing basket or small bowls | For shaping and fermenting your mini boules |
| Baking sheet or mini Dutch ovens | For baking you can bake 2–4 loaves at once |
| Parchment paper | Prevents sticking and makes transfer easier |
| Lame or sharp knife | For scoring the tops of your mini sourdough loaves |
| Cooling rack | Keeps your bread crisp as it cools |

Pro Tip: Mini loaves bake perfectly even without a Dutch oven. You can create steam by placing a small oven safe bowl of water on the lower rack this helps achieve that classic sourdough crust.
Step by Step Instructions: How to Make Mini Sourdough Loaves
Homemade sourdough might look intimidating, but once you understand the rhythm mix rest fold shape and bake it becomes second nature. Follow these clear steps to bake perfectly golden tangy mini sourdough loaves every time.
Step 1: Feed and Prepare Your Starter
Make sure your sourdough starter is active and bubbly before you begin. Feed it 4–6 hours before mixing your dough, and test it by dropping a small spoonful in water if it floats it’s ready to go!
Why it matters: A healthy starter ensures your mini loaves rise naturally without commercial yeast.
Step 2: Mix the Dough
In a large bowl combine:
- 100g active starter
- 300g lukewarm water
Stir until the starter dissolves. Then add:
- 400g bread flour
- 50g whole wheat flour
Mix until no dry flour remains. The dough will look rough and sticky that’s normal!
Cover the bowl with a damp towel and let it rest for 30–45 minutes this is called autolyse.
Step 3: Add Salt + Begin Bulk Fermentation
After resting sprinkle in 8g of salt and gently work it into the dough using your hands or a dough scraper.
Let the dough rest covered at room temperature 75–78°F / 24–26°C for about 4–5 hours performing a stretch and fold every 30 minutes during the first two hours.
To stretch and fold:
Grab one side of the dough stretch it upward and fold it over itself. Rotate the bowl and repeat 3–4 times. This builds gluten strength and structure.
Step 4: Divide + Pre-Shape the Dough
Once the dough has roughly doubled in size and looks airy gently turn it onto a lightly floured surface.
Use a bench scraper to divide the dough into 4 equal pieces around 200–220g each.
Shape each piece into a loose ball by folding the edges toward the center, then flip it seam side down. Let the pre shaped rounds rest for 15 minutes uncovered.
Step 5: Final Shaping
After resting tighten each ball by gently pulling it toward you on the counter to create surface tension.
Place each round seam side up in a floured mini proofing basket or small bowl lined with a towel. Cover and refrigerate overnight 8–12 hours.
Cold fermentation improves flavor and makes scoring easier the next day.
Step 6: Score + Bake
Preheat your oven to 450°F 230°C with a baking steel stone or tray inside for at least 30 minutes.
Take the loaves out of the fridge turn them seam side down onto parchment paper and score each one with a sharp knife or lame try a simple X or crescent slash for a rustic look.
Transfer the loaves into the hot oven and bake for 20–25 minutes or until deep golden brown with crisp crusts. For extra crunch add a small bowl of hot water on the bottom rack to create steam during the first 10 minutes.
Step 7: Cool Before Slicing
Place your freshly baked mini sourdough loaves on a cooling rack and let them rest for at least 1 hour before slicing.
This allows the crumb to finish setting and prevents a gummy texture inside.
Pro Baker’s Tip:
Brush the tops of warm loaves with melted butter or olive oil for a glossy tender crust. You can also sprinkle sea salt seeds, or even cinnamon sugar for a finishing touch depending on the flavor you want.
Flavor Variations + Creative Add-Ins
One of the best things about making mini sourdough loaves is that you can experiment without fear smaller batches mean more opportunities to play with flavor. From sweet breakfast style loaves to savory dinner rolls these flavor ideas will keep your baking fresh and exciting.
Savory Add-Ins
1. Garlic & Rosemary Mini Loaves
Mix 1 tablespoon of chopped fresh rosemary and 2 cloves of roasted garlic into your dough during the last stretch and-fold. This flavor combo pairs beautifully with soups or roasted chicken dinners.
Pro tip: Brush with olive oil and a sprinkle of flaky salt before baking for an aromatic crust.
2. Jalapeño Cheddar Sourdough
Add a kick to your mini sourdough loaves by folding in ½ cup shredded sharp cheddar and 1 finely chopped jalapeño.
Perfect as a side for chili BBQ or breakfast sandwiches slightly spicy cheesy and addictive.
Optional twist: Use pepper jack instead of cheddar for extra heat.
3. Walnut & Cranberry Rustic Mini Loaves
Fold in ⅓ cup chopped walnuts and ¼ cup dried cranberries for a balanced earthy sweetness. These loaves make a delicious holiday gift or breakfast bread with butter and honey.
Pairs well with: Cream cheese brie or fig jam.
Sweet Add-Ins
4. Chocolate Chip Sourdough Mini Loaves
Turn your classic recipe into a treat! Fold ½ cup dark chocolate chips and 1 tablespoon cocoa powder into the dough before shaping.
You’ll get mini sourdough loaves that are soft subtly tangy and naturally sweet perfect for brunch or dessert.
Serving idea: Slice and toast then spread with almond butter or drizzle with espresso glaze.
5. Orange Zest & Honey Loaves
Add the zest of one orange and 1 tablespoon of honey to your dough for a refreshing fragrant twist.
These loaves shine at breakfast with butter marmalade or even a touch of mascarpone.
6. Apple Cinnamon Swirl Mini Loaves
Mix ½ cup finely chopped apples and 1 teaspoon cinnamon into your dough. You can even layer a thin cinnamon sugar swirl for a cozy fall inspired bread.
Perfect for: Tea time or holiday brunch spreads.
Herb & Seed Combos
If you love crunchy crusts and hearty textures add:
- 1 tablespoon sesame seeds
- 1 tablespoon flaxseeds
- 1 teaspoon dried thyme or oregano
Roll your shaped dough balls in seeds before proofing they’ll bake up with a nutty aroma and rustic appeal.
Flavor Balance Tip:
When adding inclusions keep the total add ins under 20–25% of the total dough weight to prevent overloading the gluten network.
For mini loaves less is often more you want each bite to be flavorful not dense.
Storage Serving & Make Ahead Tips
Homemade mini sourdough loaves are best enjoyed fresh from the oven that irresistible crisp crust and soft interior make every bite heavenly. But with a little care you can keep that bakery-fresh texture for days or even weeks without losing flavor or quality.
How to Store Mini Sourdough Loaves
- Room Temperature 1–2 days
Store cooled loaves in a linen bread bag cotton towel or paper bag to maintain the crust. Avoid plastic bags which trap moisture and soften the crust. - Refrigerator up to 5 days
If you live in a warm climate or want to extend freshness wrap each loaf in parchment paper and store in an airtight container.- Reheat in a 350°F 175°C oven for 8–10 minutes before serving.
- Freezer up to 2 months
Once cooled wrap your mini sourdough loaves tightly in plastic wrap and then in aluminum foil or a freezer bag.- To serve: Thaw overnight in the fridge or at room temp then warm in the oven for that just baked texture.
Pro Tip: Slice the loaves before freezing you can toast individual pieces straight from the freezer for quick breakfasts.
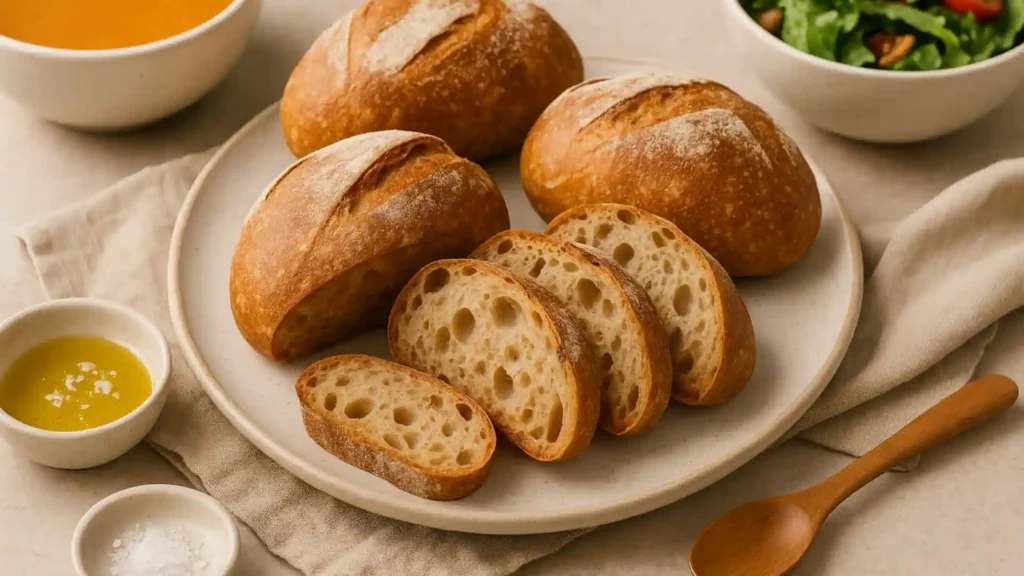
How to Serve Mini Sourdough Loaves
Because of their size and versatility mini sourdough loaves fit perfectly into almost any meal. Try these serving ideas:
- For Breakfast: Serve with butter nut spreads or fruit preserves. Try a chocolate sourdough slice with almond butter and banana for an energy boost.
- For Lunch: Cut in half for mini sandwiches think turkey avocado and sprouts or mozzarella and tomato with basil pesto.
- For Dinner: Serve warm alongside soups salads or pasta. The smaller size means perfect portions and faster reheating.
- For Appetizers: Slice thinly and toast for sourdough crostini top with smoked salmon whipped feta or roasted veggies.
Entertainer’s Hack: Bake a variety of flavored mini loaves like rosemary cheddar and chocolate chip and present them on a bread board for a rustic dinner party centerpiece.
Make-Ahead Tips for Busy Bakers
If you love the flavor of fresh sourdough but don’t always have the time:
- Cold Proof Overnight: Shape your mini loaves in the evening and refrigerate overnight. Bake the next morning for fresh bread with minimal effort.
- Freeze Pre-Baked Loaves: Fully bake and cool then freeze for later. Perfect for quick meals or last minute guests.
- Partially Bake & Finish Later: Bake for 15 minutes, cool wrap and store. When ready to serve finish baking for 10 minutes at 400°F to restore crispness.
QuickMorsels Tip:
For a gourmet touch drizzle your reheated mini sourdough loaves with olive oil sprinkle with herbs or dust with a pinch of sea salt before serving. It elevates even the simplest dinner into something restaurant worthy.
Nutrition Facts + Health Benefits of Sourdough
Sourdough bread isn’t just a culinary delight it’s one of the most naturally nutritious types of bread you can bake. Thanks to slow fermentation your mini sourdough loaves are easier to digest lower in gluten and rich in beneficial compounds that support gut and overall health.
Nutrition Per Serving 1 Mini Loaf
Approximate values; may vary slightly depending on add ins like cheese chocolate or fruit
| Nutrient | Amount | % Daily Value* |
|---|---|---|
| Calories | 180 kcal | — |
| Total Fat | 1.5g | 2% |
| Saturated Fat | 0.3g | 1% |
| Cholesterol | 0mg | 0% |
| Sodium | 200mg | 8% |
| Total Carbohydrates | 36g | 13% |
| Dietary Fiber | 2g | 7% |
| Sugars | 1g | — |
| Protein | 6g | 12% |
| Calcium | 10mg | 1% |
| Iron | 2mg | 10% |
| Potassium | 70mg | 2% |
Percent Daily Values are based on a 2,000 calorie diet.
Why Sourdough Is Healthier Than Regular Bread
- Natural Fermentation Improves Digestion
The lactic acid bacteria in sourdough break down gluten and starches during fermentation making it gentler on the stomach especially for people sensitive to yeast or refined bread. - Better Nutrient Absorption
Phytates which block mineral absorption in regular bread are reduced during sourdough fermentation. This helps your body absorb more iron magnesium and zinc naturally. - Lower Glycemic Index GI
The fermentation process slows carbohydrate digestion leading to steadier blood sugar levels a major benefit for those managing energy or blood sugar balance. - Rich in Natural Probiotics
While most live cultures don’t survive baking the acids they produce during fermentation help support beneficial gut bacteria improving gut health over time. - No Preservatives No Additives
Real mini sourdough loaves rely on time and fermentation instead of chemicals for flavor and texture. That means you get a cleaner more wholesome loaf with ingredients you can actually pronounce.
Optional Add-Ins for a Nutrition Boost
To make your mini sourdough loaves even more nutrient dense try incorporating these whole food ingredients:
- Seeds: Chia flax sunflower or pumpkin seeds for omega 3s and fiber.
- Whole Grains: Replace 20% of your bread flour with whole wheat or spelt for added minerals and a hearty taste.
- Nuts: Walnuts or almonds add crunch and heart healthy fats.
- Vegetables: Finely grated carrots or zucchini for moisture and extra fiber.
Bonus: These ingredients don’t just make your bread healthier they also add unique texture and visual appeal.
Final Thought
Sourdough is proof that simple, slow food can be incredibly good for you. Each bite of your mini sourdough loaves delivers a satisfying mix of nutrition flavor and craftsmanship no additives no shortcuts just honest ingredients transformed by time.
Troubleshooting + Common Baking Mistakes and Fixes
Even experienced bakers run into challenges when crafting the perfect mini sourdough loaves. Whether your bread turns out too dense too sour or not quite golden don’t worry sourdough is a living learning process. Below are the most common mistakes and how to fix them like a pro.
1. Dense or Flat Loaves
Problem: Your mini sourdough loaves didn’t rise enough or turned out heavy.
Causes:
- Starter wasn’t active enough.
- Dough was under-proofed too little rise time.
- Overworked or too dry dough.
Fix:
Feed your starter 4–6 hours before baking and ensure it’s bubbly and doubled in size. Give your dough enough time for bulk fermentation it should look airy and have visible bubbles before shaping.
Tip: When in doubt longer fermentation at a cooler temperature gives a better rise and flavor than rushing the process.
2. Overly Sour Flavor
Problem: Your bread tastes too tangy or acidic.
Causes:
- Starter was over-fermented.
- Dough sat too long before baking.
- Excess whole wheat flour adds acidity.
Fix:
Use your starter at its peak not after it collapses. Try shortening your fermentation time or feeding your starter more often to keep it mild.
Flavor Balance Trick: Add ½ teaspoon honey or malt syrup to neutralize excess tanginess without altering texture.
3. Crust Too Hard or Thick
Problem: Your mini sourdough loaves came out with a hard overly chewy crust.
Causes:
- Baked too long or at too high a temperature.
- Steam wasn’t maintained in the oven.
Fix:
Bake at 450°F 230°C for the first 20 minutes with steam then reduce to 400°F 200°C. You can create steam by adding a pan of hot water to the oven or using a Dutch oven with the lid on for the first half of baking.
Bonus: For a thinner crust lightly brush loaves with melted butter after baking it softens beautifully.
4. Gummy or Sticky Interior
Problem: Bread feels wet or underbaked inside.
Causes:
- Underbaked or cut too soon after baking.
- Dough too wet or poorly mixed.
Fix:
Let loaves cool for at least one hour before slicing the interior continues to set as it cools. If this happens often reduce hydration slightly or extend your bake time by 5–10 minutes.
Pro Tip: A good loaf sounds hollow when tapped on the bottom that’s your cue it’s done!
5. Weak or Uneven Crumb
Problem: The crumb interior looks tight or irregular.
Causes:
- Not enough folding during bulk fermentation.
- Shaping wasn’t tight enough.
- Uneven oven heat.
Fix:
Perform 3–4 sets of stretch-and-folds during bulk fermentation to build gluten strength. When shaping, make sure the surface tension is snug but not tearing.
Advanced Tip: Rotate loaves halfway through baking to ensure even heat distribution.
6. Burnt Bottoms
Problem: Perfect top but dark or burnt bottoms.
Causes:
- Baking too close to the oven’s lower heating element.
- Using a thin or dark baking pan.
Fix:
Place a baking sheet under your loaf pan or raise your rack to the middle of the oven. Alternatively bake your mini sourdough loaves on a pizza stone preheated for 30 minutes it evenly distributes heat for golden bottoms.
7. Lack of Flavor
Problem: Your loaves rise well but taste bland.
Causes:
- Short fermentation or cold starter.
- Low-quality flour or water.
Fix:
Use unbleached bread flour and filtered water to avoid chlorine interference. Let dough rest overnight in the fridge for a slow cold ferment it deepens both texture and taste.
Flavor Upgrade: Mix in herbs, nuts, or a touch of olive oil for a more robust profile.
Final Word from the Test Kitchen
Every sourdough loaf big or small teaches you something. Baking mini sourdough loaves gives you the perfect opportunity to experiment learn and fine tune your craft. With a few tweaks your loaves will go from good to artisan bakery in no time.
Conclusion + Call to Action
Baking your own mini sourdough loaves isn’t just about creating bread it’s about creating an experience. From nurturing your starter to shaping each tiny loaf every step connects you to a centuries old craft that rewards patience care and creativity.
Whether you prefer a rustic plain sourdough or you love experimenting with flavors like rosemary garlic or even chocolate these mini loaves give you the perfect canvas to explore. Their size makes them beginner friendly shareable and ideal for weeknight baking proof that great bread doesn’t have to mean a long complicated process.
Each batch is a reminder that slow food is still the best kind of comfort food. So next time your kitchen fills with that irresistible tangy aroma take a moment to savor the process. You didn’t just bake bread you baked a story one that starts in your starter and ends at your table.
Try It Yourself!
Ready to bake your own batch of mini sourdough loaves?
Follow the step by step guide above.
Experiment with add ins like olives seeds or chocolate chips.
Tag your creations with #QuickMorselsBakes on social media we’d love to feature your loaves!
And if you enjoyed this guide explore more sourdough recipes and flavor ideas at QuickMorsels.com your home for easy wholesome and delicious recipes for real life.
Link to a sourdough starter guide eg The Clever Carrot
Link to nutrition info eg Healthline’s sourdough article